
- Horizon
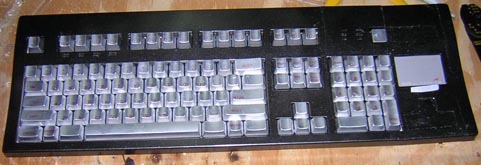
- Horizon in its final state
- All the final photos
- Why
- I'm a geek, an unorginized, goes where ever the computer goes, hard ware hacking geek. And almost everywhere I've got a computer I don't have room for a keyboard - let alone a cursed mouse. (And no a desk isn't going to help any of that.) Even forgetting how much space then need to operate in - which would be about 2 square feet I don't have I dn't like mice. For decades people have been typing on QWERTY keyboards with out Caprel Tunnel Syndrome or Ergonomics, at least until the mouse came along. I love my GUI but I love hot keys and other not a block of plastic on a rope input devices. So the solution?
A Hack
- Parts
- The first step was collecting parts. I already had a pair of matching keyboards with a tactile feedback that I love. The model isn't anything I can recall but they shipped with the StarMax clones and are very sturdy and have a nice simple parts layout. With one of them dead I had an Ideal hack canidate. That left cursor input. For that I called on everyone's favorite shopping site - eBay After a few minutes of looking I desided to risk it with a trackpad. Trackballs are nice but are large and had mechanical parts. I didn't want to bother with that. On the other hand the trackpads on most powerbooks are more sporadic than a rat on speed. However the track pads were cheaper ($5 with shipping) and lacked any nasty mechanics or shapes.
- Hiatus
- After a minor shipping problem with the trackpad (not the seller's fault, I think my regional USPS is among the worst) I was ready to hack everything after a mear two weeks. At least the seller shipped a replacement as soon as I told him it haden't arrived. Once it did (3 days later) I checked it out under 9.x and 10.1.5 to make sure it works, and it did. Since I check the keyboards beforehand I went into the lab and ripped away.
- Layout
- Desiding the layout didn't take much, more of "What chunk of keyboard do I want to cut out" That wasn't hard either. The page up/down, help, home, ect section was the perfect size and would need the least shaping and patching. With that decided it was hack saw time.
- Caffeine and the human power saw
- Thanks to penguin mints and winning iTMS caped Pepsis I had tons of energy to burn off in the form of shacking hands (not quite that bad, but it was a lot more caffine than I'm used to) Armed with a marker, a hack saw and later a plastic blade enabled table saw it didn't take long to get the six sections I needed (top and bottom for the main key sections, the extention to mount the track pad, and the end cap to make it look natural)

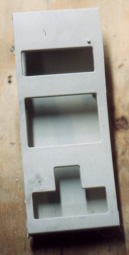
- Nurse, the E6000 please
- I know there are many recomended plastic bonding methods for these Dr. Frankenstein case hacks but I had a bottle of E6000 on hand so rather than buying more adheasices I went with it. For the most part no regrets about it either. I used the same epoxy to place two plexi fillers where the arrow and F13-F15 keys are. From there I started attaching the parts.
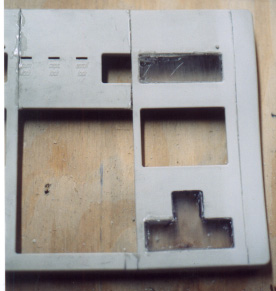


- Obligatory problem
- Every mod has its problem, and this one was some miscut plastic. Fortunatly it was on the recieving end and I was able to chop off the needed piece. Once I finished gluing everything together It was painting time

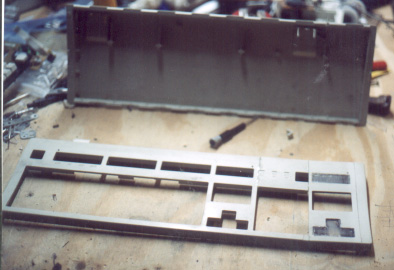
- Electronics
- This isn't some half assed job. To do this right I decided on mount the electronics (hot glue, that oft forgotten hacking tool) then soldering the contacts to the keyboard's electronics. Anything to break out the soldering iron and multimeter I guess. From there I kocked up a plastic button and drilled holes to get to the SMT switches. A little double sided foam tape and that was set.

- mmmmmmm... Paint fumes
- I'm sure that Frankenstein's Monster would have wanted some makeup to hide his scars so why should my monster be any different? I still had some metal flake plack from the PowerMatrix and parts of Diamonds So that was great for the frame.

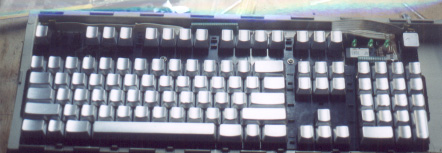
- That left the ratty looking keys. This was a greater challenge since I'm not a touch typest and my last attempt at transparent paint and a keyboard wasn't the greatest. OTOH I'm still not a touch typist. I did decide on grey similar to the touch pad. I went with metal flake again because primer wasn't very attractive (even tho' it was a better match). To paint the keys I pulled off all the keys to get a better coating. Unlike the transparent paint I didn't worry about it pooling. Still I hit it with several coats of paint. It still looks better.
- Elsewhere in the store
- While picking up the paint I decided to walk over to the hobby section. Its probably a good thing I did too, since right there were printable decals, you know the water solutable things that model makers love for WWII planes? Well It didn't take me long to pick a set up and get home to make up some art for relabled keys. I love photoshop. A few test prints later and I was ready to hit the included paper and prep it as per the instructions on the box. The Next day, after letting it dry a nice 18 hours I set out to attach the decals to the keyboard. This probably took the longest ammount of time, since I had to attach and position about 100 labels none of them more than an inch or soe per side. Still the result was definatly worth it. BTW the font is the default title font in my blog. I debated between it and an LED font but this looks better. I'm very happy with it
- All in all
- I'm extremely happy with this one, between the labeling, the painting, the hack and slashing (so good it fits together like it was designed to), and the electronics I don't see too many flaws with it. Maybe the semi-noticable crack between the pieces and the *slight* gap on the underside where the top is a bit longer than the bottom. Deinatly one of my best works, and functional too...
- Final Photos
- Other Hacks


