
- Diamonds
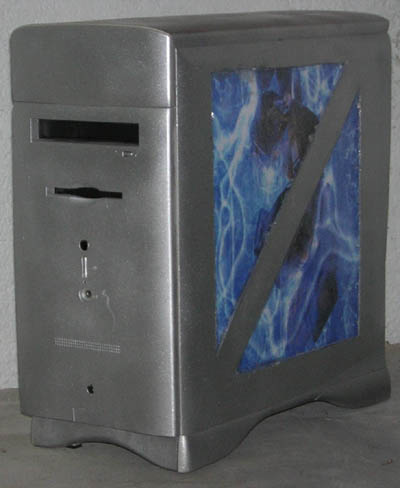
- The final product
- No chat. I want photos!
- I did a lot to this one, and almost none of it was done in a single track manner. At most times I was bouncing back and forth between different aspects of the case until I finished it, so bear with me in this write up.
- Diamonds is a 6400/200 with a 4GB hard drive and 136mbs of RAM. And thats just the technical specs. In this case I've got 4 CCFLs, 4 flush mounted triangular windows, a pair of 12' x 12" full color images, and a full paint job of both the case and the drives.
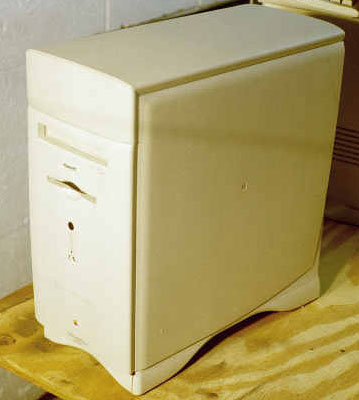
- Mmmmmmmmmmmmm Marshmallow......
- I've had this system, entirely stock and completly neglected, since mid 2002, or longer since this poor system came out of a school. Under my care it was just sitting around doing nothing until about October 2003 when I got around to cooking up an idea for it.

- Plastic Surgery
-
This hack needed alot of planning for the window and the insert to work out. From the start I wanted it to be flush almost untouched look. On the 6400 the panels attach with some plastic hook things that mate with the metal chassis that houses the system. To get the desired look without killing alot of the support it offered I maked out each of these hooks and designed my triangles around them. It turned out a triangle would be the easiest way that looked good so I marked it out and get ready to cut the panels.
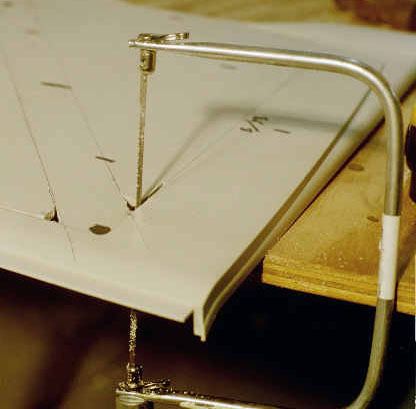
- Inital Cuts
- ABS Plastics aren't my friend. Cutting the panels was a true pain. More impacient people might have used a dremal tool and at one point I have as well, but I learned. I wanted this clean so insted of hacking away with powertools I started with a coping saw then followed up with a hacksaw blade (wrapped in tape at one end) and files. It turned out nice but it also caused it to take time. However the results were worth it
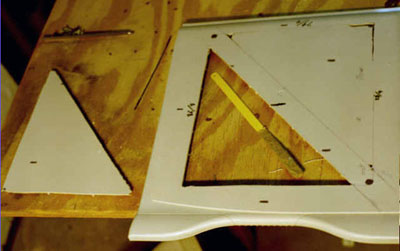
- One down, 3 to go
- After I knocked out all four of the triangles my next concern was getting the plexi to fill the holes. Like the holes in the side panels I had to do a rough cut and work it down until I had the perfect fit.
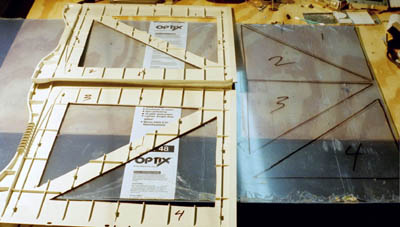
- Outlining the triangles
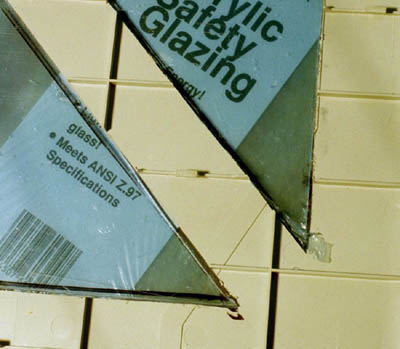
- Just right
- After I got the final shape of the panels I applied a bead of Clear Seal (water sealant designed for windows or something like that) along the inner rim of the side panels then slipped in the plexi. After that I flipped it over quickly so that the outside face was pressed agasint the workbench. Quick and easy flush mounting.
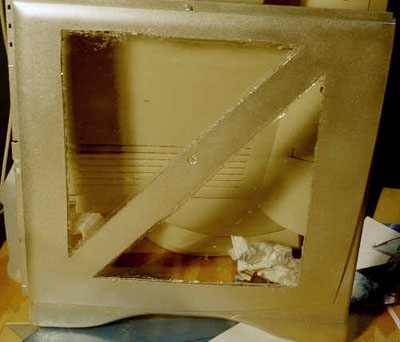
- Oh yeah, I painted the panels before I installed the windows, saving myself the effort of masking everything off. I won't go throught the hoops of painting butI ended up making 3 passes with the silver paint.
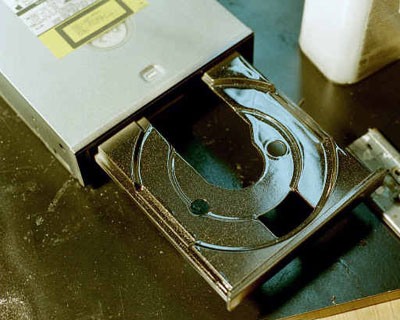
- Even the drives got painted
- Except maybe for covering the drives. I didn't want to leave this half done and I didn't want to go through the hassel of finding a black SCSI CD Drive and being that I've got upteen spares I opted to paint the CD. I had some Metal Flake Black paint (same brand and texture as the silver I used) left over from PowerMatrix So angling my spray away from the guts of the CD I managed to paint both the bottom and top of the tray. Once It dried I closed the tray and painted the front of the drive. While some will argue that this isn't the safest way, it worked and I didn't kill the drive. I'm not saying its safe, even a speck can kill the drive, but it worked.
- Cursed Speed Bumps
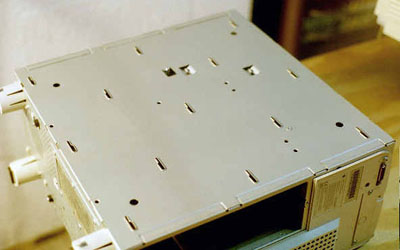
- The insert was one of the first parts finished on Diamonds but until I had the window one of the least important. In the chassis design Apple for some unknown reason raised the catches for the plastics. As far as I can tell this doesn't serve any purpose except to slow my project, or add sparks, I'm not really sure
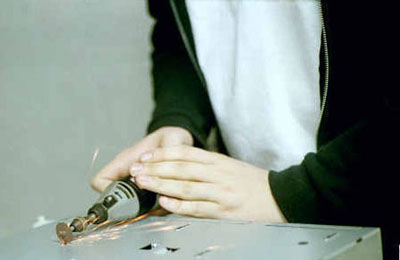
- These as sparks. Fun.
- I had to grind down all of those nasty bumps on both sides of the case, and must have gone through a dozen heavy duty roatary cutting wheels, but I needed to grind them down for the Paper inserts. The inserts in this hack aren't any different from the ones unsed in some clear iBook mods, cube mods or any number of other Macs. Make a clear hole, add an image, pronounce it good. My image was a larg desktop file from Macdesktops.com, Resexcellence.com or TheAppleCollection.com I forget which. Anyways it was the largest verion of it they had. From there I took it into photoshop and ripped it down into 8 images, 4 per side, flipped so it created the appearance of a 3d sculpture, or something. I'm a techie, not some Urbanite Art Guru. Anyways once I had the 8 files I printed them out onto sheets of glossy photopaper then taped them together for a seamless effect.

- The inserts
-
With the patterns assembled I made holes in them where the panels had hooks that I haden't grinded down. This ment about 9 holes on each insert. First I taped them down then carefully probed with an xacto knife. When I found the hole I trimmed it out and continued until I had all of the holes made. With that done all that was left was the CCFLs
- High Voltage Tower
-
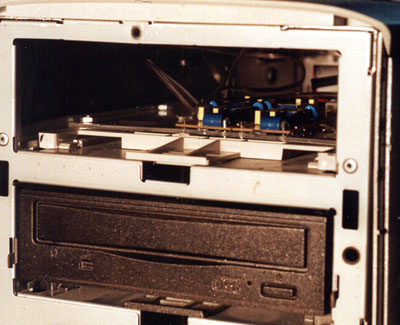
There are lots of ways to do this, from modder kits bought online, to parts picked up at your favorite auto shop, to electronics surplus. Since I love the semll of solder in the morning I went for the DIY approch and orded 4 backlights and inverts from When they arrived I had to mount the inverters in the case with out having them come into electrical contact with the case. So digging around in my lab I found an unused 5.25" drive sled that worked in the 6400. From there I hacked away some of the plastics and trimmed up a scrap piece of plexi to mount the inverters. After a couple hours I had all of the inverters hooked up to a molex connector. That took care of power but not the mounting of the CCFLs themselves.

- Let there be light.
-
To get power from the inverters to the CCFLs I routed some speaker wire around the edge of the panels and to the connector on the tubes leads. This worked out nicely since the gauge wire I had fitted nicely into the connectors. A little glue and those were set. From there I gorged out some more plastics and glued in the tubes. That solution allowed me enough room to mount them next to the chassis but barely enough to get the panels back onto the case. Once I got the panels back on I set it aside until i got its specs up to something usable in Late December 2003.
- Anyways, enough talk, lets see some photos
- Stock Photo
- Window Photos
- Painting Photos
- Paper Insert Photos
- CCFL photos
- Final Photos


